
A dog car seat can look simple, but a poor installation can turn a helpful product into a moving object during sudden braking. That creates stress for the driver, passengers, and the pet. The better solution is to treat installation as a safety checklist, not a quick “place it and buckle it” task.
To install a dog car seat correctly, first confirm vehicle seat compatibility, then secure the product to the vehicle using the intended attachment method, such as a seat belt, headrest strap, lower anchor, or ISOFIX-style base. After that, connect the pet restraint, test movement, check stability, and repeat the inspection before every trip.
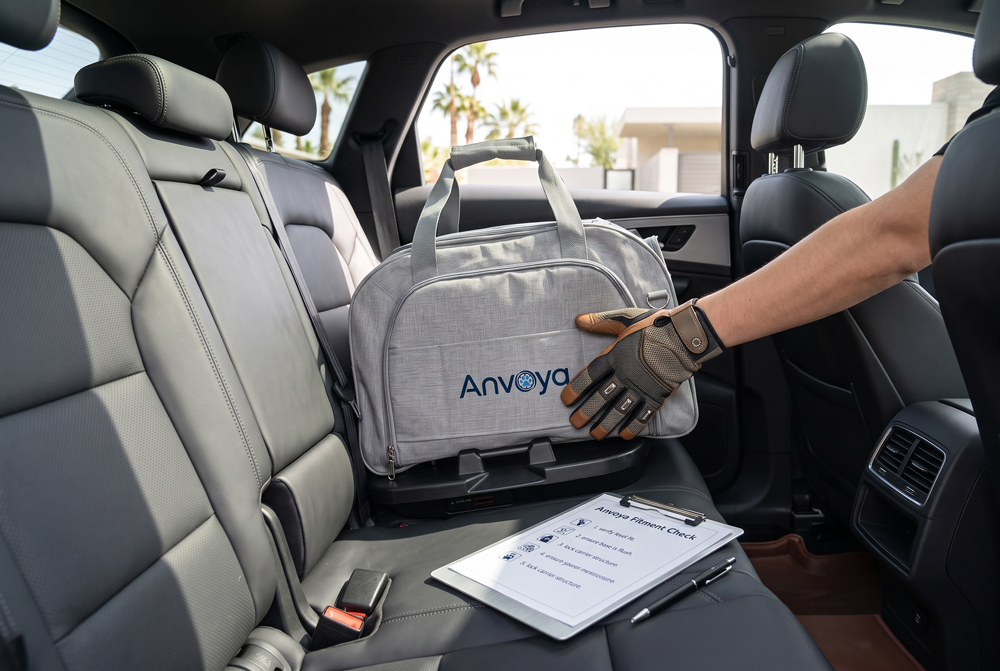
Many pet owners focus on whether the pet is inside the carrier or booster. I prefer to ask a different question first: is the product itself properly attached to the vehicle? That mindset changes the whole installation process and moves the discussion toward vehicle-ready pet travel systems.
How Does a Dog Car Seat Attach to a Vehicle Seat?
A dog car seat may attach in several ways, and this is where many mistakes begin. If buyers assume every seat installs the same way, they may miss key anchor points or use the wrong vehicle position. That can reduce stability before the trip even starts.
A dog car seat usually attaches with one or more connection methods: the vehicle seat belt, headrest straps, backrest straps, lower anchors, ISOFIX connectors, or a dedicated vehicle base. The best setup keeps the pet product fixed to the vehicle seat and limits forward, side, and rotational movement.
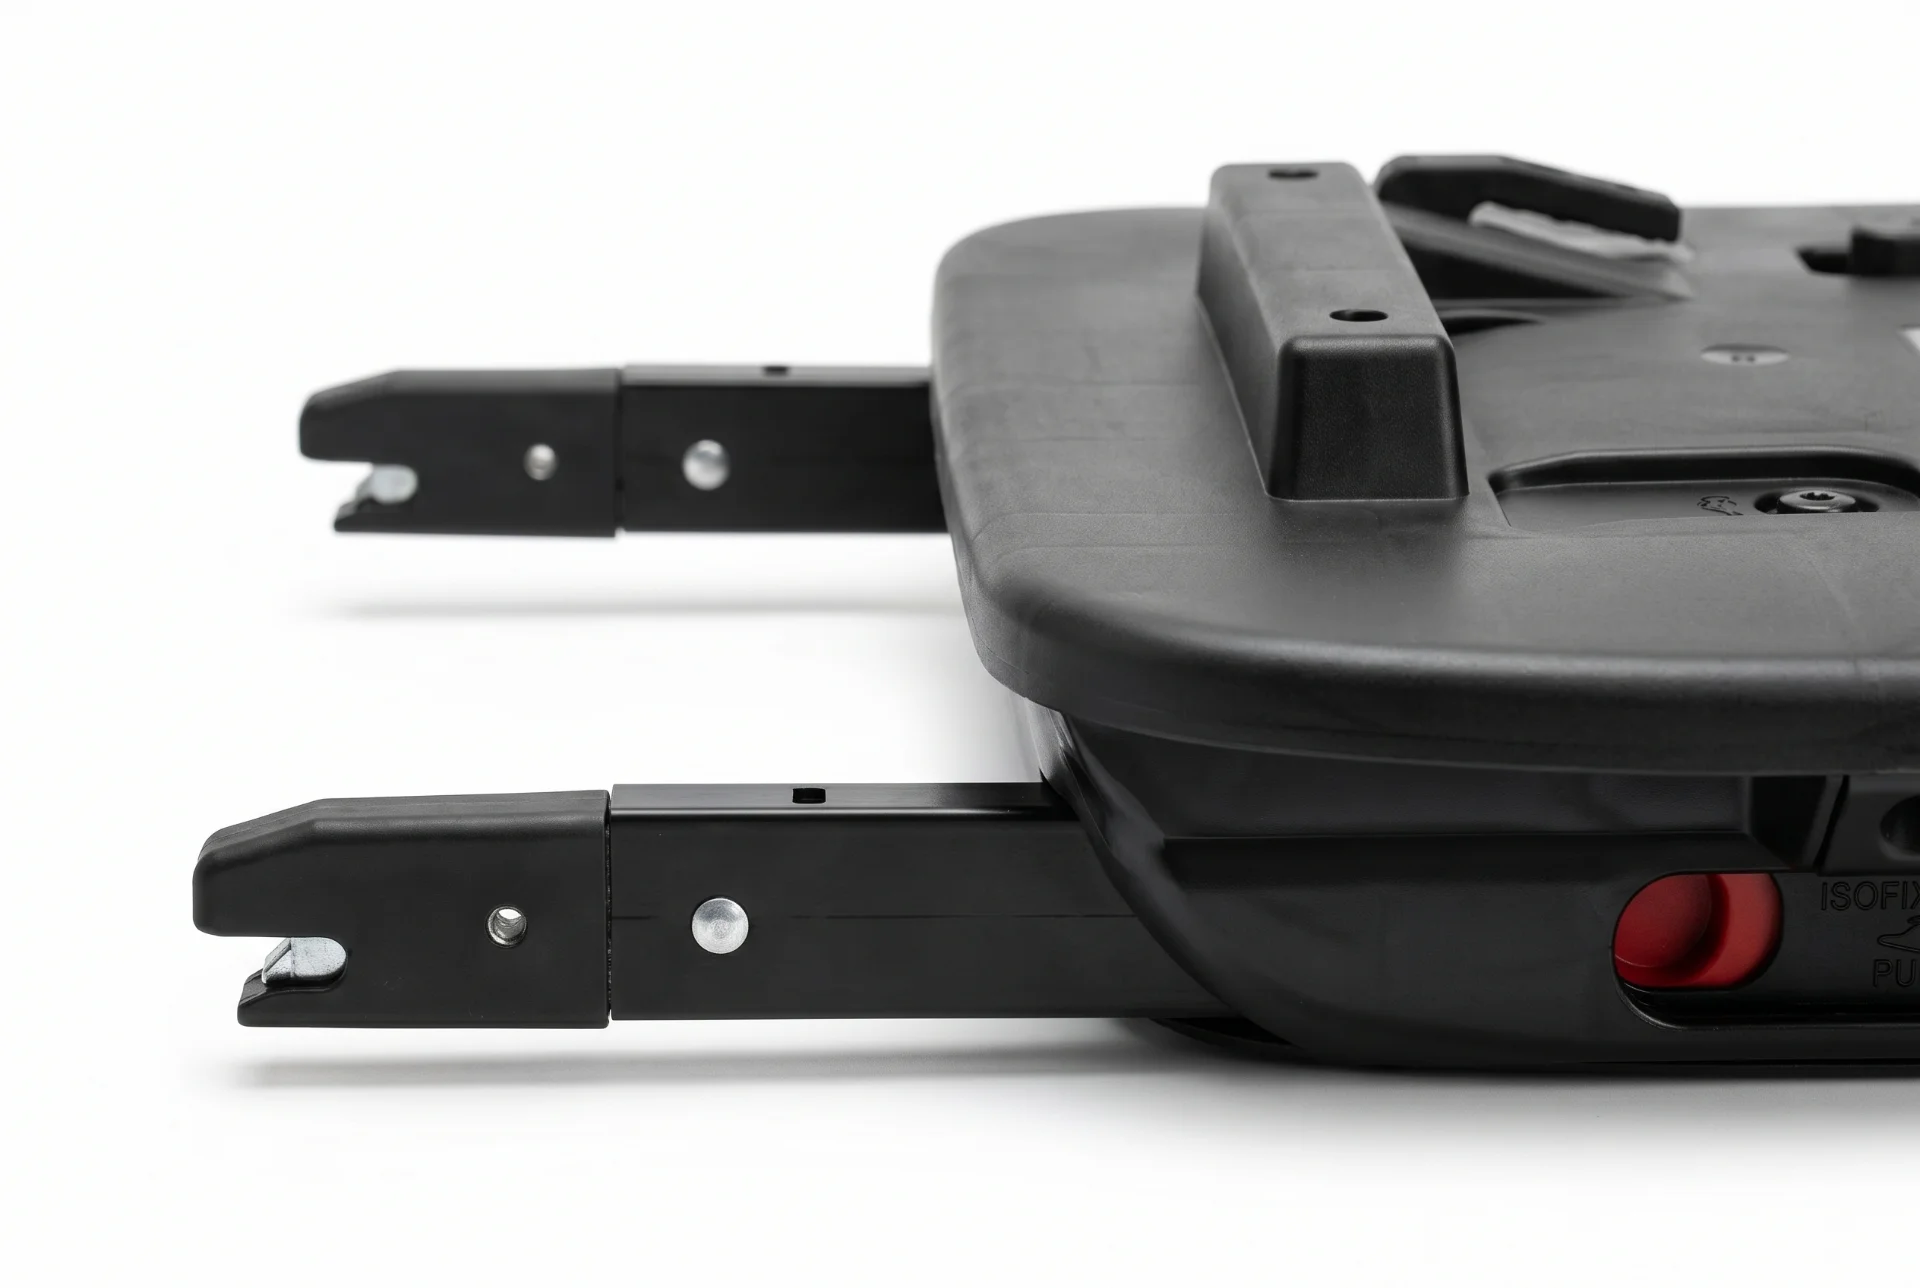
Common attachment methods
Different products use different restraint strategies. I often tell buyers not to judge only by appearance. Two products can look similar in photos, but their vehicle attachment logic may be completely different.
| Attachment method | How it works | Best for | Buyer evaluation point |
|---|---|---|---|
| Vehicle seat belt routing | Seat belt passes through guides, loops, or structural channels | Carrier seats, booster seats, soft-sided systems | Check belt path clarity and locking stability |
| Headrest strap | Strap loops around the headrest posts | Booster seats and raised pet seats | Check strap strength and headrest compatibility |
| Backrest or seatback strap | Strap wraps around the vehicle seatback | Small to medium pet seats | Check whether the strap prevents tipping |
| Lower anchor / ISOFIX-style connector | Connector attaches to fixed vehicle anchors | Vehicle-ready systems and modular bases | Check compatibility with vehicle anchor positions |
| Dedicated base | Pet carrier locks onto a base installed in the vehicle | Modular travel systems | Check lock confirmation and release control |
Why attachment points matter
A pet travel product should not only contain the pet. The product itself also needs to remain securely attached to the vehicle. This is the main shift from a simple pet basket to a vehicle-ready pet carrier.
In my work with pet travel product development, I have seen many samples that look comfortable on a bench but move too much when placed on a sloped or contoured car seat. Vehicle seats are not flat shelves. They have:
- Seat cushion angles
- Side bolsters
- Gap areas between cushion and backrest
- Headrest variations
- Seat belt buckle positions
- Different rear-seat widths
These details affect how a dog car seat sits and how it behaves when the vehicle brakes.
What buyers should check before installation
Before installing, I recommend checking these points:
-
Vehicle seat shape
The base of the product should sit evenly without rocking. -
Seat belt access
The seat belt should reach the routing path without twisting or pressing awkwardly into the product. -
Headrest availability
Some headrests are fixed, integrated, or shaped in ways that do not hold straps well. -
Anchor location
If a product uses lower anchors or an ISOFIX-style base, the vehicle anchor spacing and access must match the product design. -
Product manual
The installation method should be clear enough that a normal user can repeat it correctly.
At Anvoya, we look at this from a child-restraint engineering mindset. That does not mean pet seats are regulated like child car seats. They are not. But the thinking is useful: load paths, anchoring, misuse prevention, and repeatable installation quality matter.
How Do You Install a Dog Car Seat Correctly?
Installing a dog car seat can feel easy, but easy does not always mean correct. A seat may look secure after the belt is buckled, yet still slide, tip, or rotate when pulled. That is why installation should follow a repeatable process.
To install a dog car seat correctly, read the manual, choose a compatible vehicle seat, position the product flat against the seat, attach it using the designed belt path or anchor system, tighten all straps, connect the pet restraint, and test movement before driving.
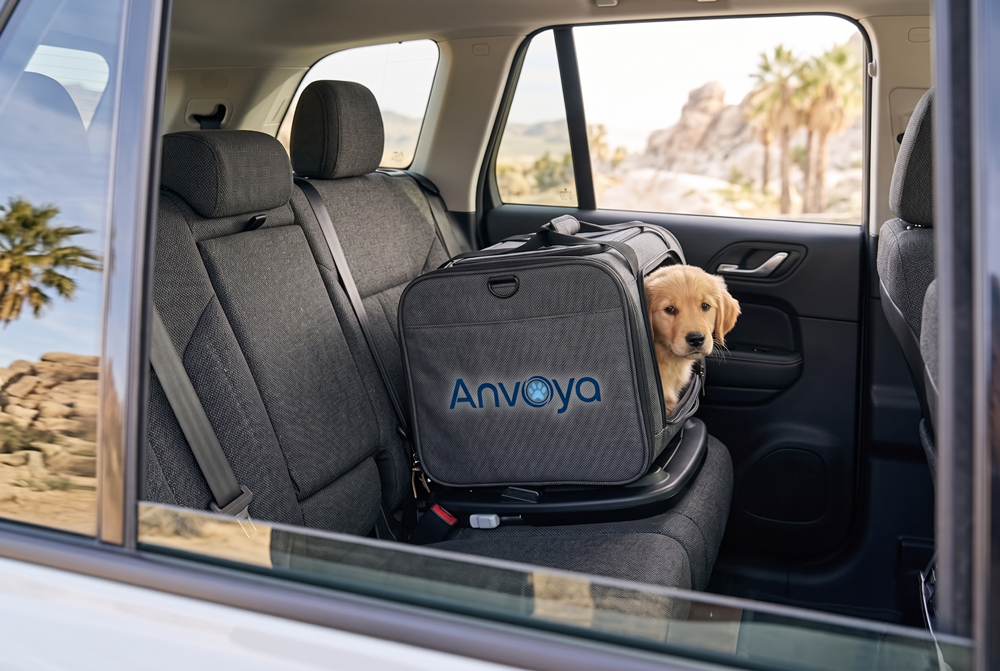
Step-by-step dog car seat installation checklist
Use this checklist as a practical process. It works for many common pet car seats, boosters, carriers, and modular systems. However, the product manual should always take priority.
1. Read the manual before placing the product
This sounds basic, but I have learned not to skip it. Many installation errors happen because the user guesses the belt path. Some pet products have decorative handles, comfort straps, or fabric loops that are not designed to carry vehicle loads.
Look for:
- Approved seating positions
- Seat belt routing diagrams
- Strap attachment instructions
- Pet tether guidance
- Weight limits
- Warnings about front airbags
- Cleaning or reassembly notes after washing
2. Place the dog car seat on a compatible vehicle seat
The product should sit with its base fully supported. If the seat cushion is too narrow, too sloped, or too heavily contoured, the product may not sit correctly.
A quick visual check helps:
- Does the product lean to one side?
- Does the front edge hang over the vehicle seat?
- Does the back touch the vehicle seatback?
- Does the product compress unevenly?
3. Route the seat belt or connect the anchor system
If the product uses the vehicle belt, route the lap belt and shoulder belt exactly as shown. Do not invent a shortcut. If the system uses lower anchors or an ISOFIX-style base, connect both sides evenly and confirm that the connectors are fully engaged.
With a modular base such as Anvoya’s BASE-X concept, the key idea is to make the vehicle connection more structured. The carrier should attach to the base, and the base should attach to the vehicle. This helps existing carrier designs become more vehicle-ready, depending on compatibility and proper validation.
4. Tighten and remove slack
Slack is the enemy of stability. After connecting the belt or anchors, press the product down into the seat and tighten the strap or belt. The goal is not to crush the product. The goal is to remove unnecessary movement.
Check these areas:
- Belt slack near buckle
- Twisted webbing
- Loose headrest straps
- Uneven lower anchor tension
- Carrier-to-base looseness
5. Attach the pet restraint correctly
The pet should be connected using the product’s intended tether or restraint point. For many products, this attaches to a pet harness, not a collar. A collar connection can increase neck injury risk during sudden movement.
For application-specific decisions, buyers should consult qualified safety professionals, veterinarians, or product engineers. Pet size, behavior, vehicle type, and travel distance all matter.
6. Perform a movement test
After installation, give the product a firm pull at the base and upper section. It should not slide freely, tip easily, or rotate excessively.
A simple rule helps:
If the product moves in a way that surprises you during a hand check, it may move even more during driving.
This final test is not a laboratory crash test. It is a practical installation check. But it often catches mistakes before the car moves.
Where Should a Dog Car Seat Be Installed?
A dog car seat should not be placed only where the pet looks happiest. The wrong vehicle position can expose the pet product to airbags, unstable surfaces, poor belt geometry, or driver distraction. Good placement supports both pet comfort and driving safety.
A dog car seat is usually best installed on the rear vehicle seat, using a stable seating position with proper belt access or anchor compatibility. Avoid front passenger seats with active airbags unless the product manual and vehicle manual clearly allow that setup.
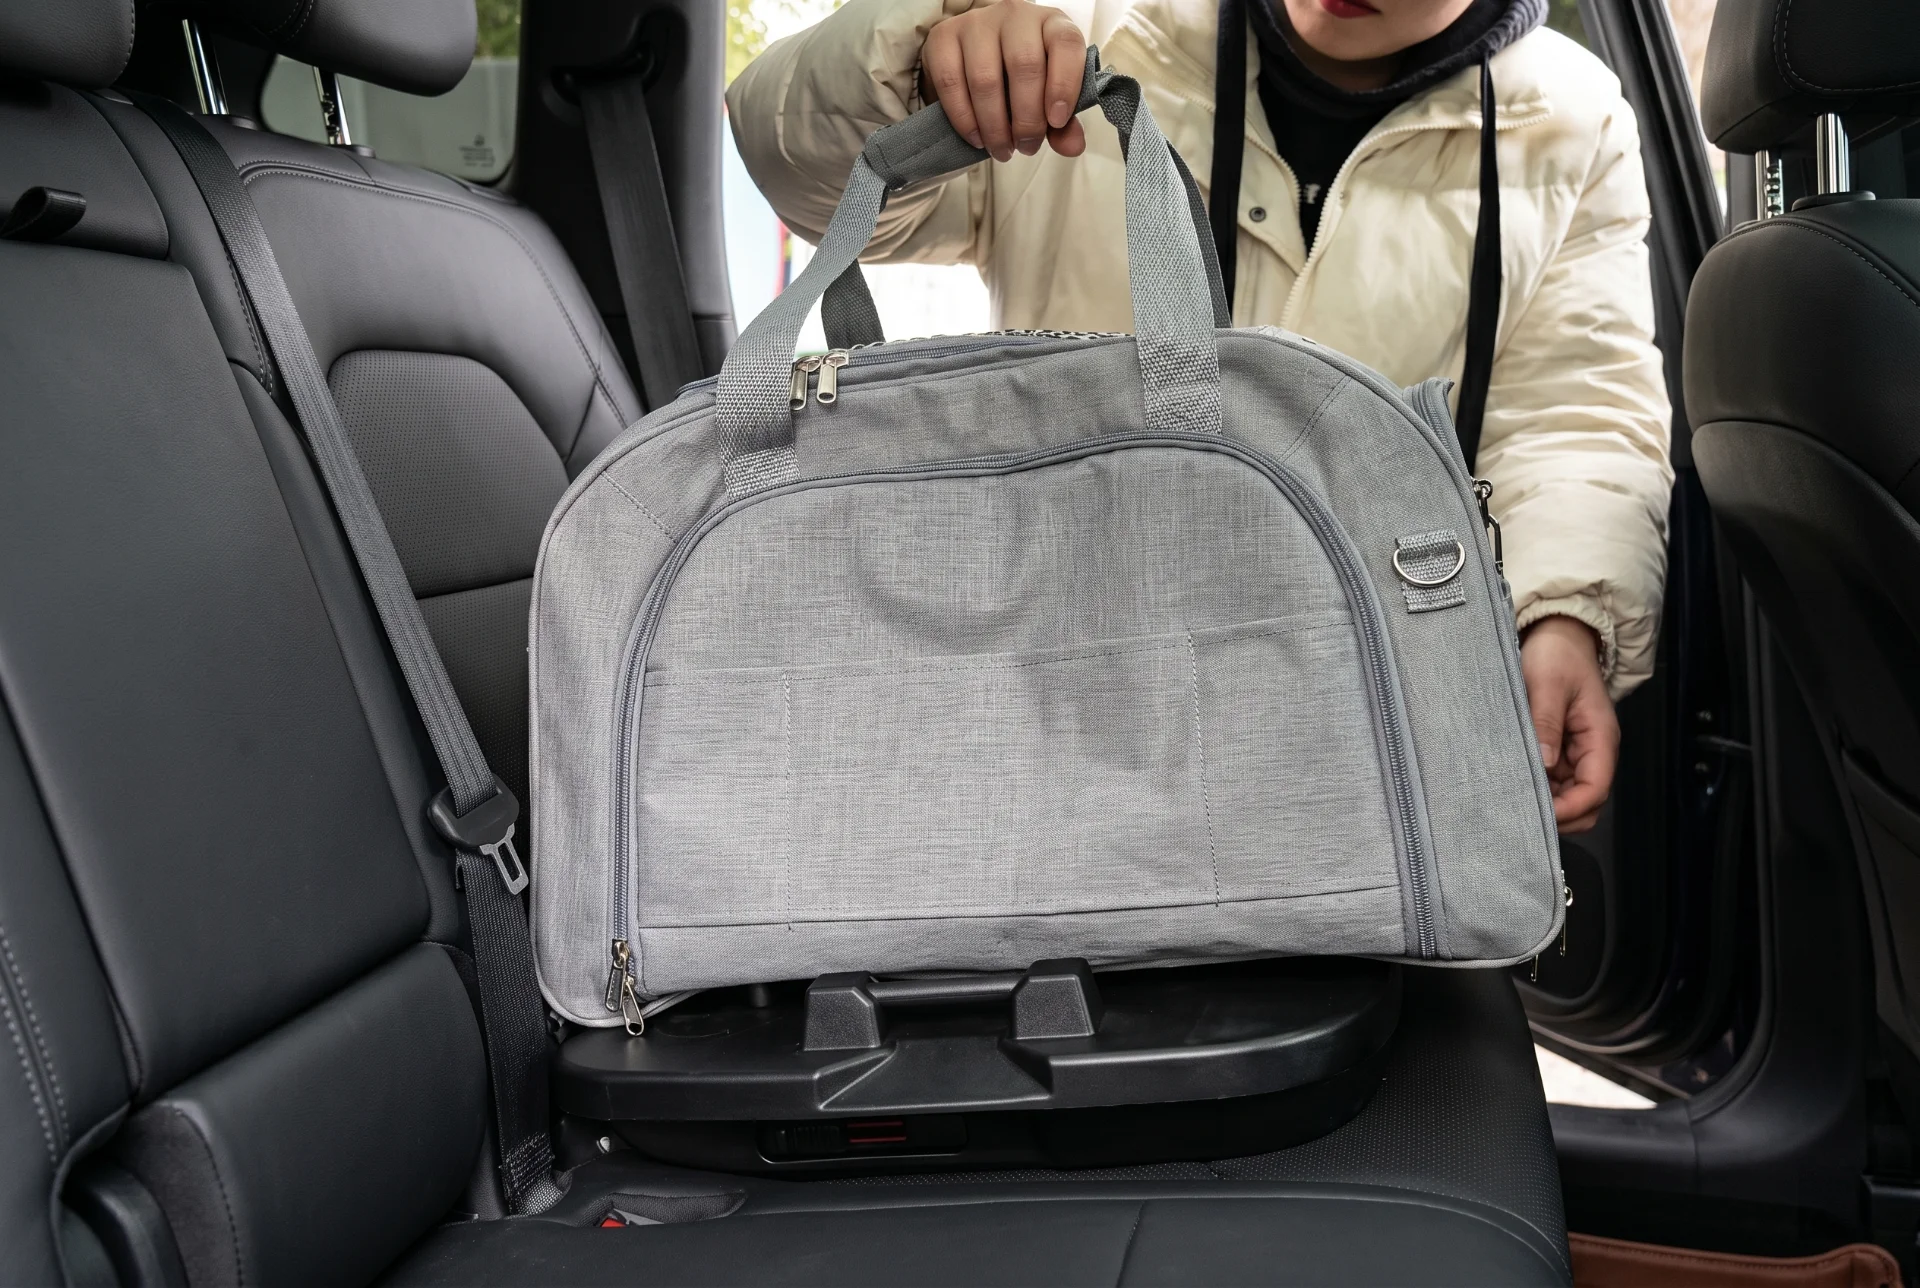
Rear seat is usually the preferred starting point
For most installations, the rear seat is the safer and more practical starting point. It keeps the pet away from the driver’s lap, steering wheel, pedals, and dashboard airbag zone.
The rear seat also usually gives better options for:
- Seat belt routing
- Lower anchor access
- Side-door loading
- Reduced driver distraction
- More stable product placement
Still, not every rear seat is the same. A small hatchback, SUV, sedan, and pickup truck can all present different challenges.
Comparing common vehicle positions
| Vehicle position | Possible benefit | Possible concern | Practical recommendation |
|---|---|---|---|
| Rear passenger side | Easy curbside loading in many markets | Side impact exposure depends on crash scenario | Good general choice if belt path works |
| Rear driver side | Easy monitoring through mirror | Loading may occur near traffic in some regions | Use if compatible and practical |
| Rear center | Farther from side doors | Narrow seat, poor belt geometry, hump shape | Use only if product sits stable and manual allows |
| Front passenger seat | Easy pet visibility | Airbag risk, driver distraction | Avoid unless clearly permitted |
| Cargo area | More space for large carriers | May lack proper anchors or belt points | Use only with approved anchoring system |
Why driver distraction matters
Anvoya’s safety philosophy begins with a simple idea: an unsecured pet is not only at risk. The pet can also distract the driver, interfere with vehicle control, or become a moving load during sudden braking.
I have heard many pet owners say, “My dog is calm.” That may be true on a normal day. But dogs react to sudden sounds, sharp turns, other animals, open windows, and emergency braking. A calm pet can still move unexpectedly.
A properly installed dog car seat helps reduce this risk by creating a defined travel position.
Seat angle and support are easy to overlook
Vehicle seats often tilt backward. Some pet boosters and carriers are soft. When those two factors combine, the pet may sit at an angle that affects comfort and product stability.
Check for:
- Front-to-back rocking
- Side-to-side lean
- Product base hanging over the seat edge
- Belt buckle pressing into the pet area
- Strap rubbing against plastic trim
- Door interference when closing
If the product uses a base, the base should create a more stable interface between the vehicle and carrier. This is one reason modular pet travel systems are becoming more interesting for brands and retailers. A base can help make the installation more repeatable, especially when the same carrier is used for car, carry, and stroller modes.
Do not ignore the vehicle manual
The pet product manual and vehicle manual should work together. Vehicle manufacturers define where seat belts, airbags, and lower anchors are located. Pet product manufacturers define how their product should be installed.
If those two instructions conflict, buyers should pause. For commercial buyers, this is also a supplier evaluation point. A responsible supplier should provide clear installation guidance and explain known compatibility limits.
How Do You Secure a Dog Car Seat for Safe Travel?
A dog car seat is only part of the system. If the product is attached but the pet is loose, the installation is incomplete. If the pet is tethered but the product slides, the setup is also incomplete. Both sides must work together.
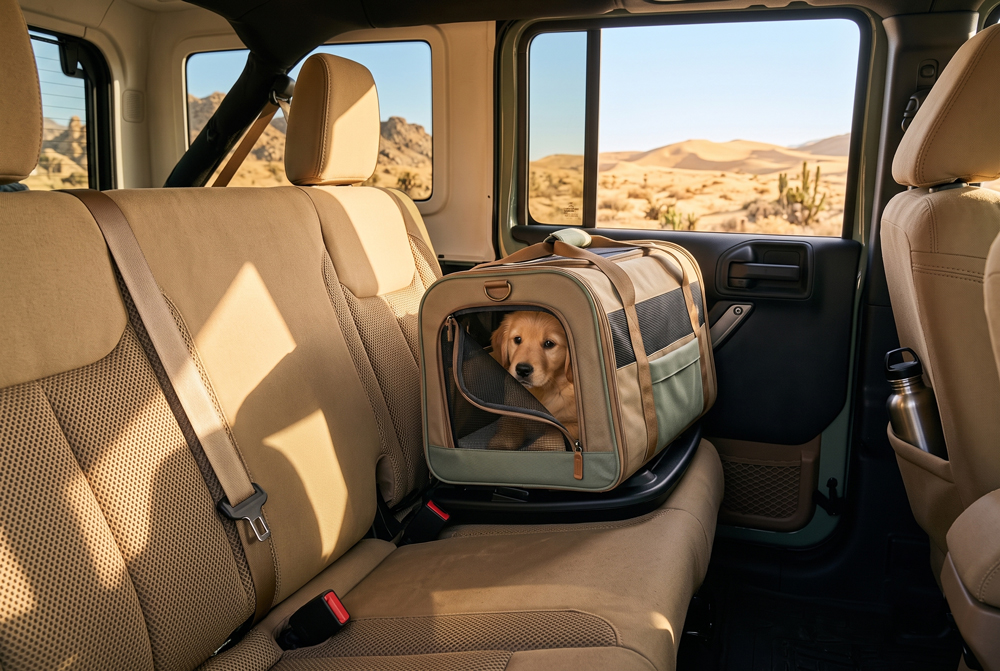
To secure a dog car seat for safe travel, secure the product to the vehicle first, then secure the pet to the product using the intended tether, harness connection, or carrier closure. The complete system should limit product movement, pet escape, driver distraction, and sudden load transfer.
Think in two layers of restraint
A strong installation has two connected layers:
-
Vehicle-to-product restraint
This keeps the dog car seat, carrier, or base attached to the vehicle. -
Pet-to-product restraint
This keeps the pet inside or connected to the travel product.
Many low-cost products focus mainly on the second layer. They create a cozy basket or booster with an internal leash. But if the whole basket slides across the seat, the pet is still not traveling in a controlled system.
Product restraint: keep the seat attached
The product should be attached through designed structural zones. These may include:
- Reinforced belt channels
- Rigid base connectors
- Load-bearing webbing
- Lower anchor connectors
- Carrier lock points
- Anti-rotation supports
The key word is designed. A random fabric handle may not be a structural attachment point. A decorative loop may not be intended for crash or braking loads.
For OEM/ODM buyers, I recommend asking suppliers direct questions:
- Which parts carry the load during sudden braking?
- Is the belt path reinforced?
- How is webbing stitched and tested?
- Does the carrier lock to the base mechanically?
- What misuse cases were considered?
- Can the factory maintain consistent stitching and assembly quality?
These questions reveal whether the supplier is thinking like a travel-safety manufacturer or only like a soft-goods supplier.
Pet restraint: use a harness-friendly connection
Many products include an internal tether. In most cases, that tether should connect to a pet harness, not directly to a collar. A harness spreads load across the body better than a collar. The tether length should also be short enough to prevent climbing out, but not so short that the pet is forced into an unnatural posture.
A practical pet restraint check includes:
- The pet can sit or lie naturally.
- The pet cannot jump out.
- The tether is not wrapped around the legs.
- The clip is fully closed.
- The harness fits the pet’s body.
- The carrier zipper, latch, or cover is fully secured if used.
Safe travel is not the same as an absolute safety guarantee
This point matters. Pet car seats do not currently operate under the same unified and mandatory crash-test regulations as child restraint systems. Crash testing can be a valuable engineering tool, but it should not be described as proof of absolute safety or as equivalent to legal child car seat certification.
At Anvoya, our advantage comes from child car seat engineering DNA: vehicle anchoring, ISOFIX connection logic, structural load paths, dynamic-load thinking, misuse prevention, tooling control, material selection, and production consistency. These methods help create better pet travel products. However, buyers should still verify documentation, review test methods carefully, and seek qualified evaluation for application-specific requirements.
A simple secure-travel checklist
Before driving, confirm:
- The vehicle attachment is tight.
- The product does not slide easily.
- The pet is connected or enclosed.
- The tether is attached to a harness.
- The pet cannot reach the driver.
- Doors, buckles, and zippers are closed.
- Nothing blocks the driver’s view.
- The product manual has been followed.
This checklist takes less than a minute. I like it because it turns safety from an idea into a habit.
What Should You Check After Installing a Dog Car Seat?
A dog car seat should be checked after installation because movement, strap slack, pet behavior, and vehicle vibration can change the setup. A product that looked stable at first may loosen after loading the pet or after several short trips.
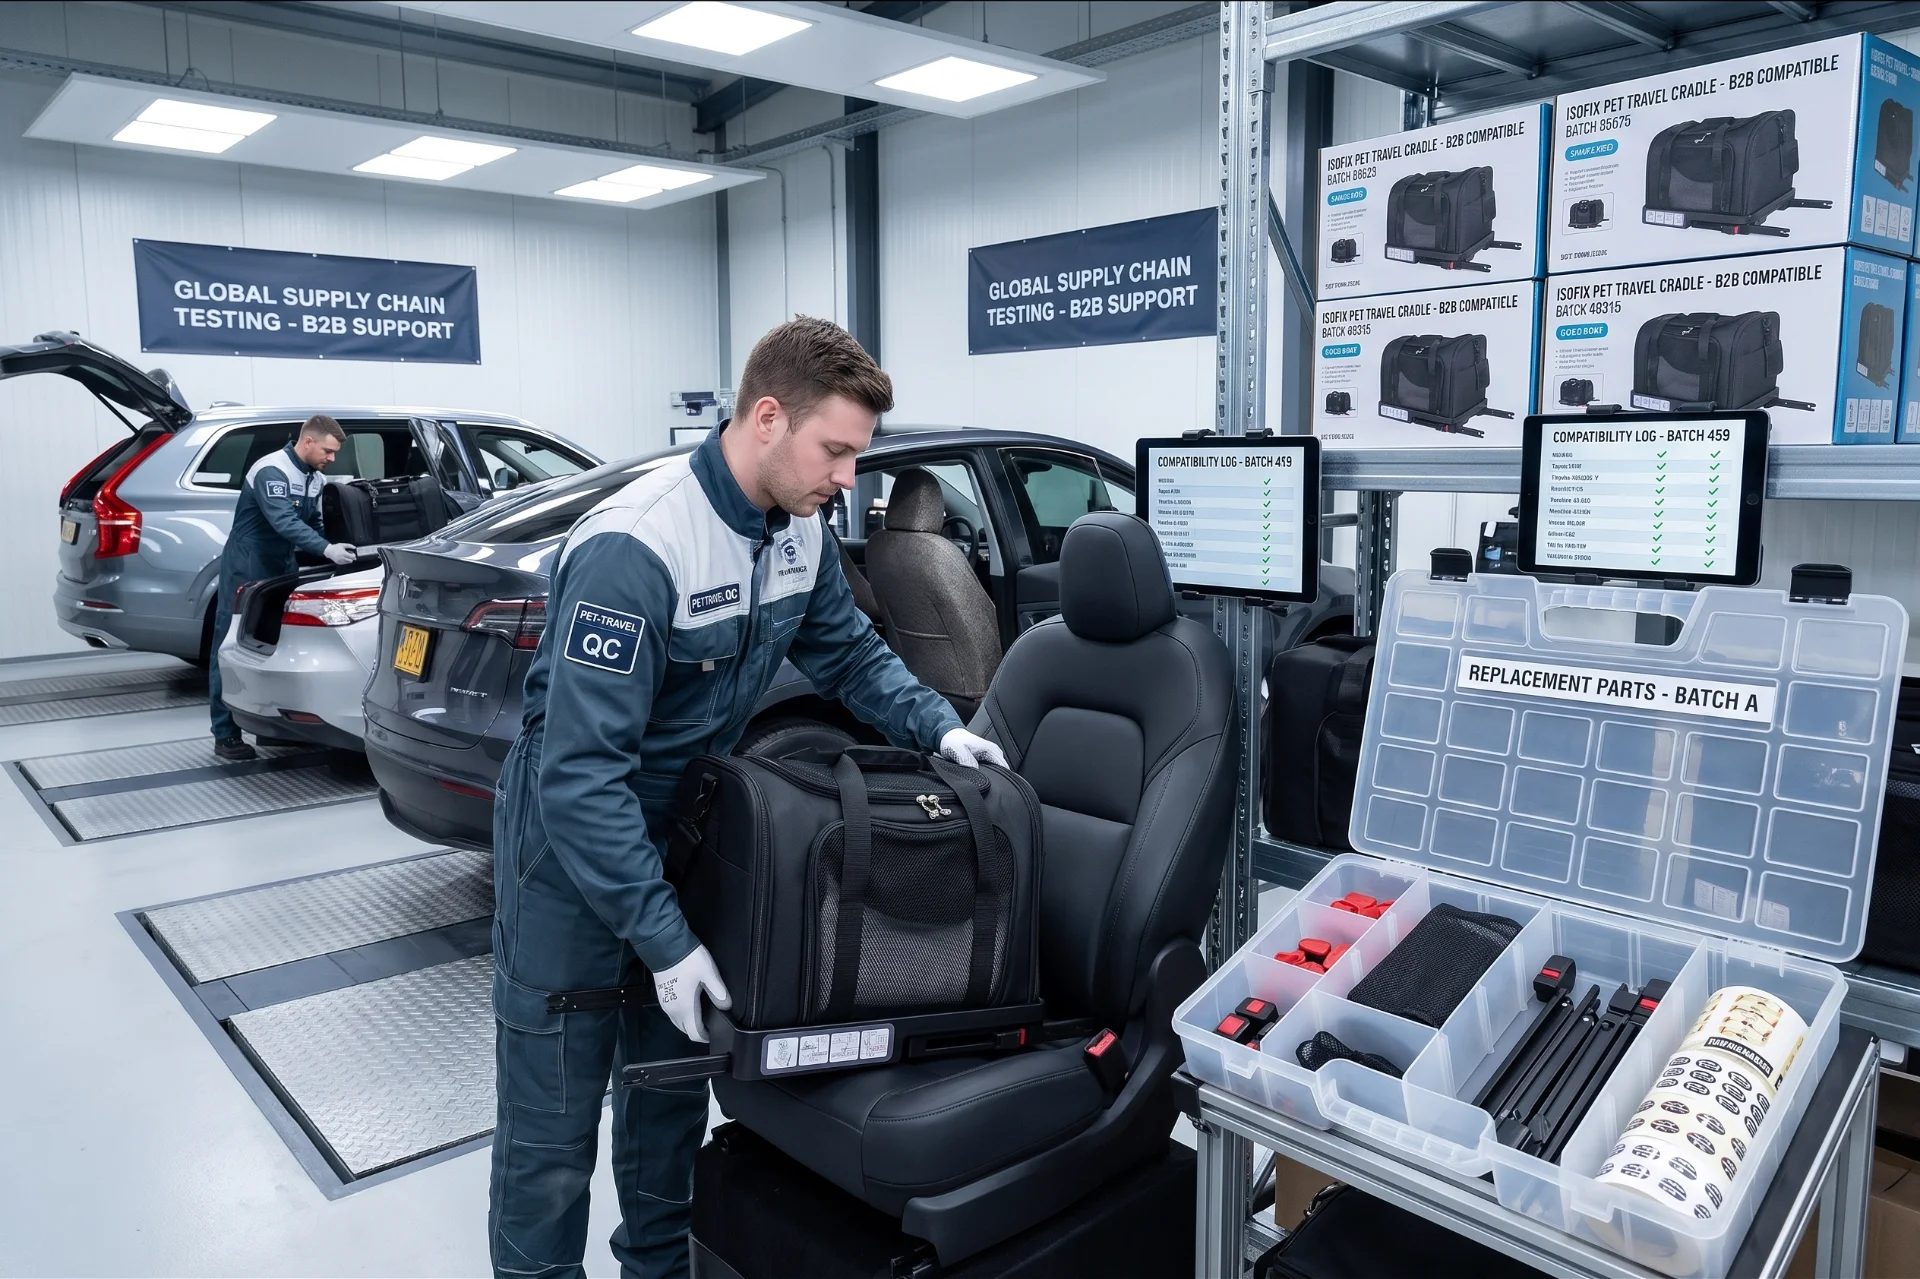
After installing a dog car seat, check product stability, belt tension, strap position, pet harness connection, carrier locks, buckle access, and pet comfort. Pull the product firmly from different directions and confirm that the seat does not slide, tip, or rotate beyond the product’s intended limits.
The final check should be active, not visual
A visual check is not enough. I always prefer an active check because it reveals hidden problems. The product may look centered, but a firm pull may show that the belt path is loose or the base is not locked.
Use three test directions:
-
Forward pull
Pull toward the front of the car to simulate braking direction. -
Side pull
Pull toward each door to check lateral movement. -
Lift and rotation check
Try to lift or twist the product slightly to detect tipping risk.
You are not trying to damage the product. You are checking whether installation tension is real.
Post-installation checklist
| Check item | What to look for | Why it matters |
|---|---|---|
| Seat belt tension | No obvious slack or twisting | Slack allows extra movement |
| Strap angle | Straps follow intended direction | Poor angle can reduce restraint performance |
| Base contact | Product sits flat and supported | Uneven contact can cause tipping |
| Lock confirmation | Carrier clicks or shows locked status | Prevents carrier separation |
| Pet tether | Attached to harness, not twisted | Helps control pet movement |
| Buckle position | Buckle does not press into product awkwardly | Prevents accidental release or discomfort |
| Pet posture | Pet can sit, turn, or lie as intended | Comfort reduces restlessness |
| Driver area | Pet cannot reach front controls | Reduces distraction risk |
Check again after loading the pet
The product may behave differently once the pet is inside. A 5 kg small dog and a 12 kg medium dog create different loading. A nervous dog may push against the sides or try to climb out. A sleepy dog may settle into one corner and change the balance.
After placing the pet inside:
- Recheck product level.
- Confirm the tether length.
- Close covers or latches.
- Make sure paws are not caught.
- Check that the pet does not press against release buttons.
- Confirm that ventilation openings are not blocked.
Check after the first few minutes of travel
If possible, stop safely after a short distance and inspect the setup again. This is especially useful with a new product, a new vehicle, or a pet that is not used to travel.
Look for:
- Loosened straps
- Shifted cushion position
- Twisted tether
- Pet stress signs
- Product noise or rattling
- Carrier movement on the base
This habit also helps brands and product teams. When I review a pet travel product, I care about how easily a normal user can repeat the correct installation. If a product needs too much adjustment after every trip, the design may need better guides, stronger structure, clearer lock feedback, or more intuitive strap routing.
For B2B buyers: installation quality is a commercial feature
For pet brands, importers, distributors, and private-label buyers, installation is not only a user issue. It affects reviews, returns, customer service, and brand trust.
A strong supplier should help you evaluate:
- Vehicle compatibility range
- Clear user instructions
- Repeatable installation process
- Production consistency
- Material and stitching control
- Locking mechanism durability
- Packaging education
- After-sales troubleshooting
This is where modular systems have strong commercial value. A product like a car-ready base can preserve an existing best-selling carrier while upgrading the vehicle installation experience. That reduces development risk and can shorten time to market, if the compatibility work is done carefully.
Frequently Asked Questions
Can I install a dog car seat in the front passenger seat?
You should usually avoid the front passenger seat because of airbag risk and driver distraction. The rear seat is normally the better starting point. If you consider front-seat installation, check both the vehicle manual and product manual, and do not use that position unless it is clearly allowed.
Should a dog car seat attach to a collar or a harness?
A pet tether should usually attach to a well-fitted harness, not a collar. A harness can distribute force across the body better than a collar. Always follow the product manual, and choose a harness that matches the pet’s size, weight, and behavior.
How tight should a dog car seat be after installation?
The product should feel stable and should not slide, tip, or rotate easily when pulled by hand. You do not need to crush the seat or deform the product. The goal is to remove slack and create a secure connection to the vehicle seat.
Is an ISOFIX pet car seat safer than a seat belt model?
An ISOFIX-style or lower-anchor system can improve installation repeatability when designed and used correctly. However, buyers should not assume automatic safety. They should check compatibility, supplier testing, lock quality, material strength, and instructions. Pet products are not regulated like child restraint systems.
Do I need to check the dog car seat before every trip?
Yes. A quick pre-trip check is a good habit. Straps can loosen, pets can move tethers, and carriers can shift during loading. Before driving, confirm the product is attached, the pet is secured, and the setup does not interfere with the driver.
Conclusion
Installing a dog car seat is not just “put it on the seat and buckle it.” A better process checks vehicle compatibility, attachment points, belt or anchor connection, product stability, pet restraint, and final movement after installation. This mindset turns a simple pet seat into a more vehicle-ready travel system. If you are developing pet travel products, Anvoya can help you evaluate modular bases, carrier integration, and OEM/ODM solutions with practical safety engineering in mind.